
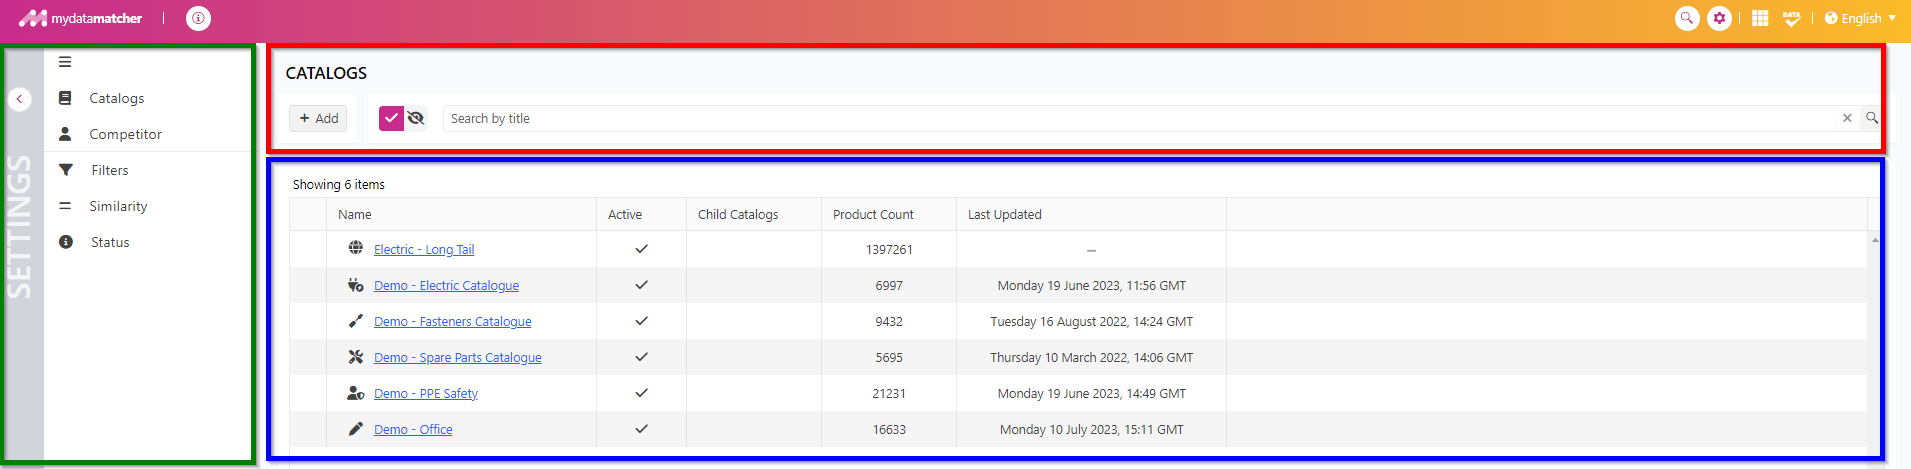
By clicking on the setting icon on the upper right, you will land in the administration window (if you have permissions). The new administrator console enables to manage competitor and catalog data. And now also features sales preferences. Other options will be available soon in the new console, but can be reached today via the menu’s overview using Mydatatagger and Mydataconfigurator.
By clicking on one of the catalogs in the blue frame, you will get an option to set sales preferences on catalog level.
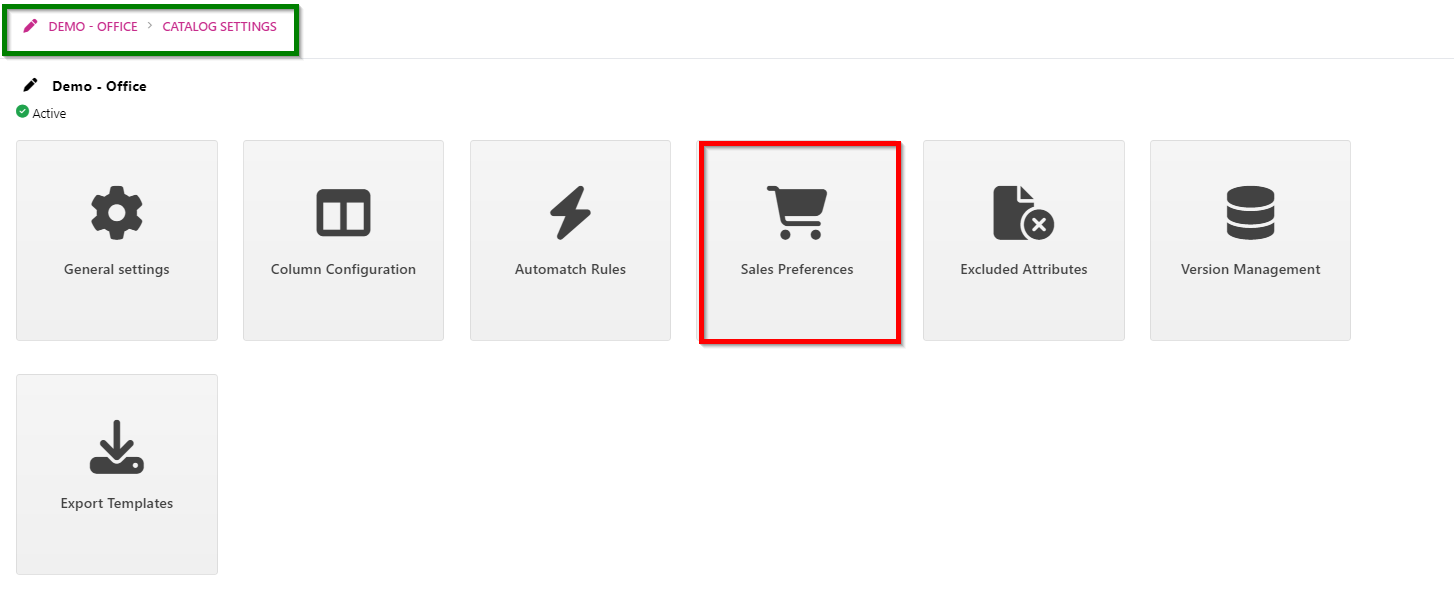
Here you are in the settings page for the catalog you have selected, as you can see in the green frame.
When you click on sales preferences in the red frame, you will be able to create and edit sales preferences and map sales preferences to your catalog.
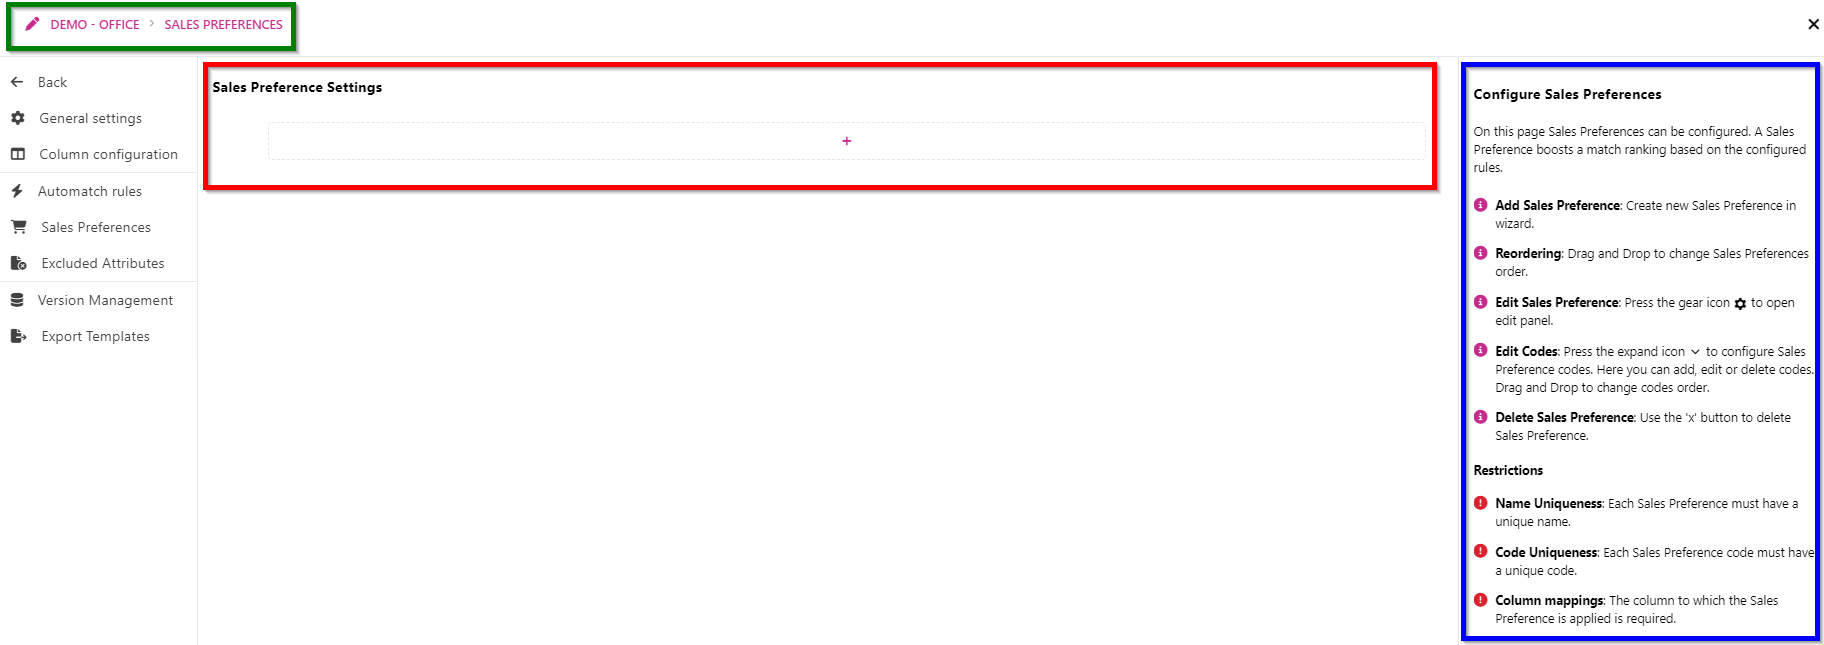
In the green frame you can see in which catalog you are setting the sales preference
In the red frame, you will actually create a sales preference.
In the blue frame there is an explanation on how to configure sales preferences.
Sales Preference is a list of values which influences the match positions.
The higher a value is preferred, the better a match will be ranked.
A Sales Preference is mapped to a catalog on a column.
Certain conditions can also be applied.
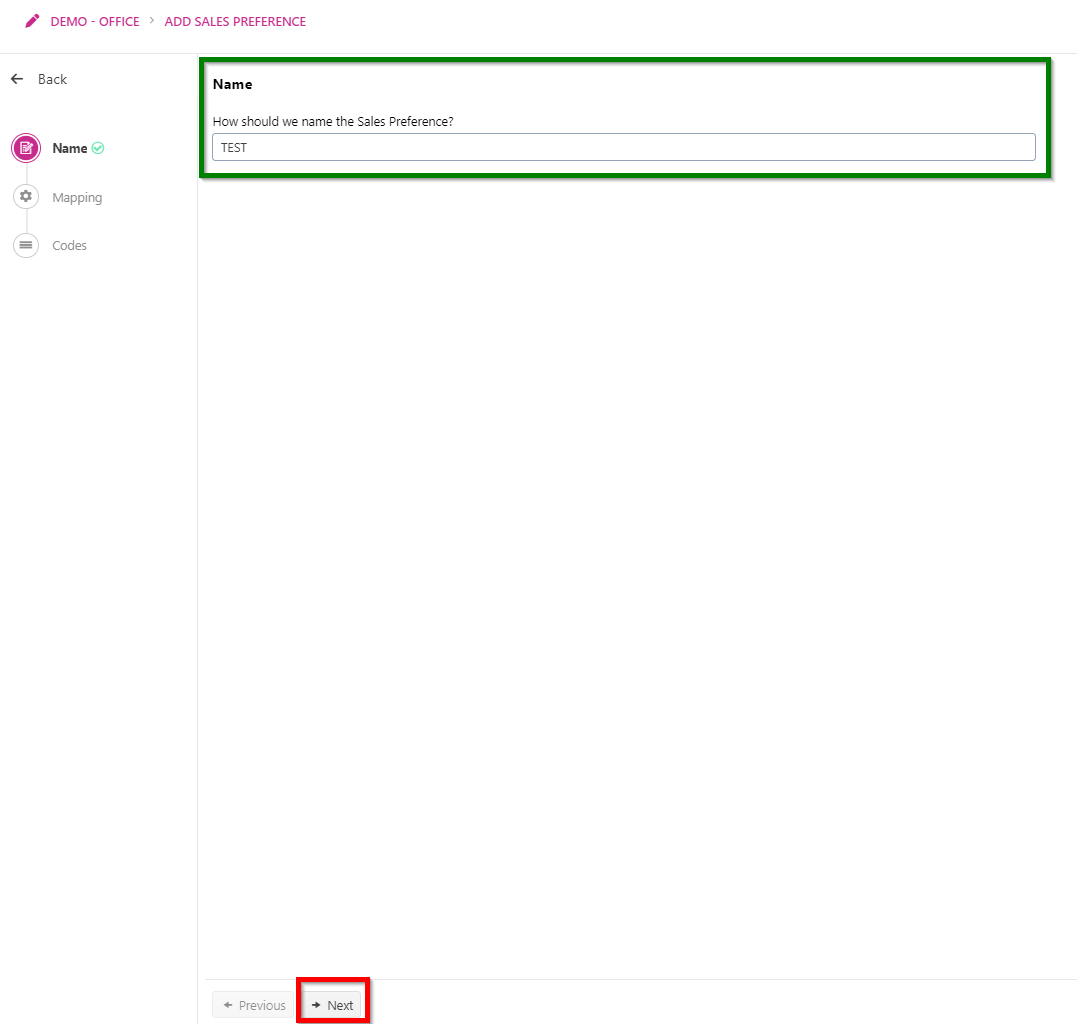
When you have clicked on “+”, you will be directed onto this screen.
In the green frame: set the name of the sales preference
Each Sales Preference must have a unique name.
In the red frame, click next when you are done.
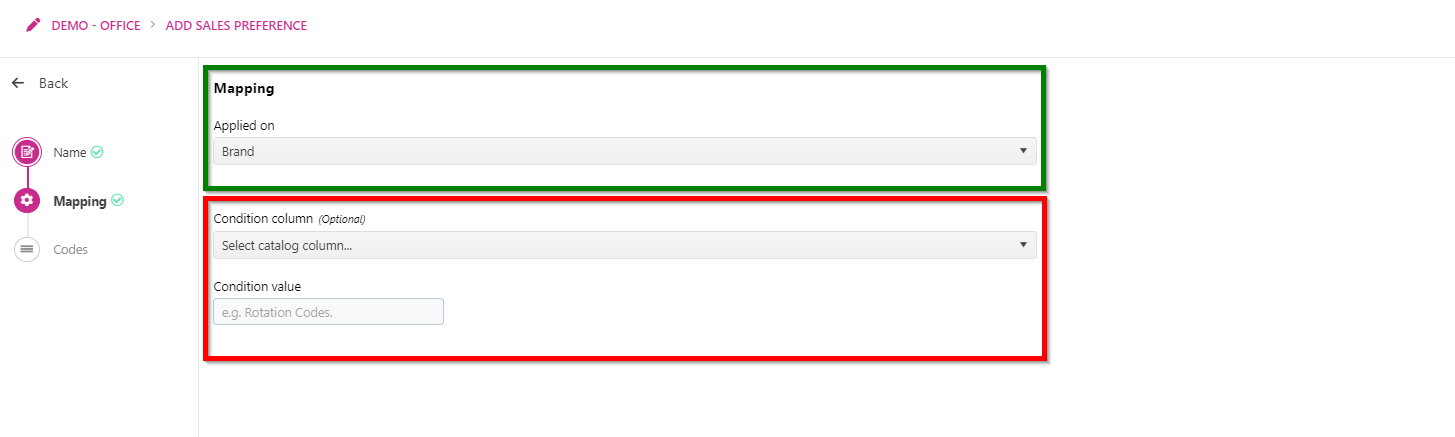
In the green frame, select the catalog column to which the Sales Preference should be applied. This is required.
As an example, this coulde be a Brand that you would like to set as Sales Preference.
In the red frame, the Sales Preference can be restricted with a condition. The Sales Preference will be used if the specified condition column and value are found in the match.
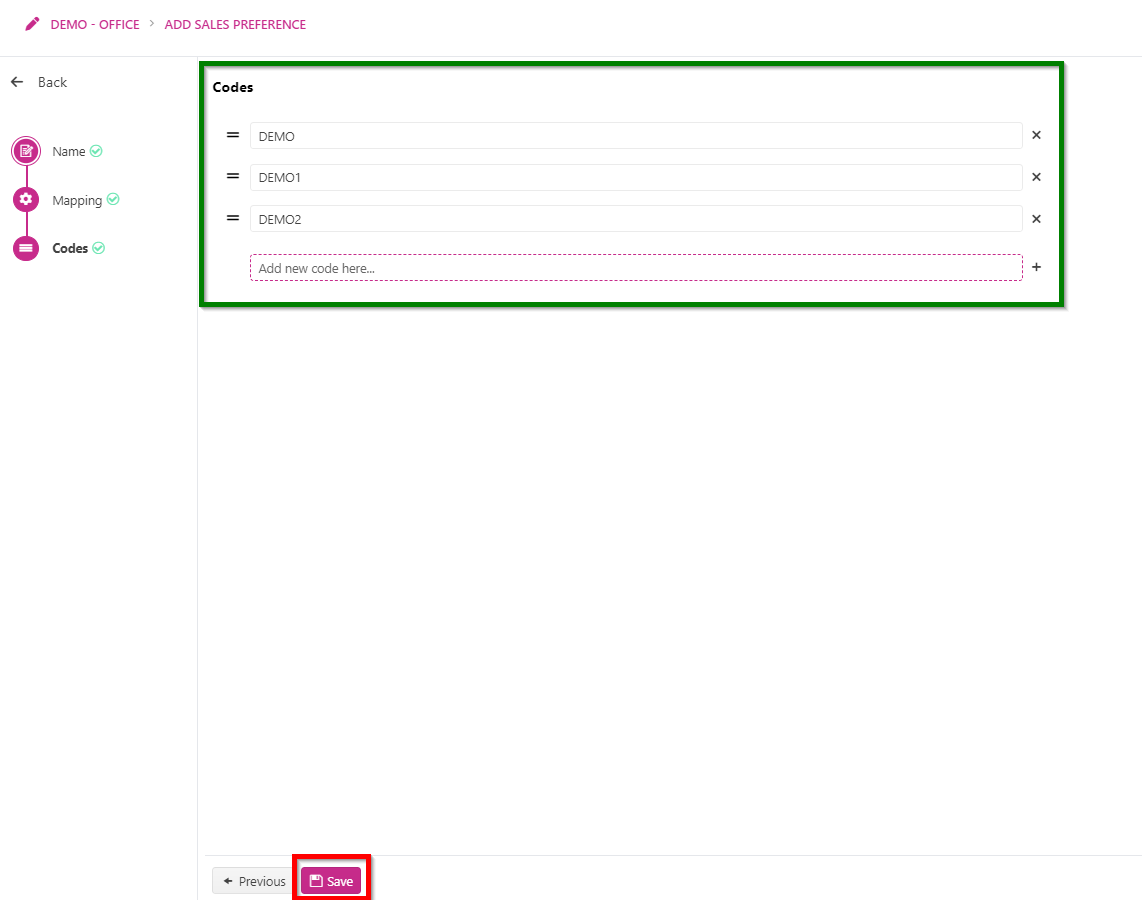
In the green frame you can add, edit or delete codes.
-
Drag and Drop to change the order of the codes.
-
A code corresponds to the values on which the sales preference is applied.
-
Each Sales Preference code must have a unique code.
-
A code cannot be empty
Press the save button in the red frame to save the Sales Preference when ready.